IoT Hacking Part 1 (Dumpster Diving)

It’s about time this blog explored some new areas of cyber security. We think it could be fun to dive into the topic of IoT and hardware hacking. So what the hell is IoT. Well if you are reading this my guess is that you already have a good idea but this is what wikipedia says:
Internet of things (IoT) describes devices with sensors, processing ability, software and other technologies that connect and exchange data with other devices and systems over the Internet or other communication networks.
That’s…. abstract. I guess it’s everything connected to the internet? Well IoT is kind of a way to say that there’s more than PC:s and Smart Phones connected to the internet. All that other stuff also has a CPU, it executes instructions from a memory and so it can be hacked.
I don’t really have a plan for where this is going so I just thought we would start this first part in the IoT series by going dumpster diving and take it from there.

So for everybody that is new to the concept of dumpster diving, here’s what Tech Target says:
Dumpster diving is looking for treasure in someone else’s trash. In the world of information technology (IT), dumpster diving is a technique used to retrieve information that could be used to carry out an attack or gain access to a computer network from disposed items.
That’s where we start this series. Im going to find a device in a scrapyard and see what information I can retrieve from it and then we take it further from there.
Let’s go!
Recon
In Sweden we have this infamous place called “Återbruket”. This is where you take all that stuff that in some way can be recycled. There’s one big container wher you can dump all your electronic devices that are either broken or outdated.

It’s probably illegal to go to such a place and retrive stuff that others have disposed. But still, there’s no guards and as long as you are not carrying away a 100" tv I guess no one will ever take notice. So the idea that bad people could do this is not very far fetched.
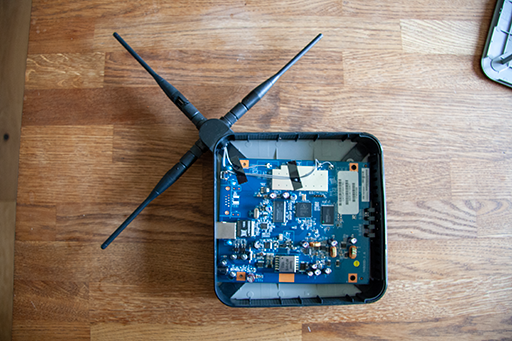
Now, imagine that we go there and find this:
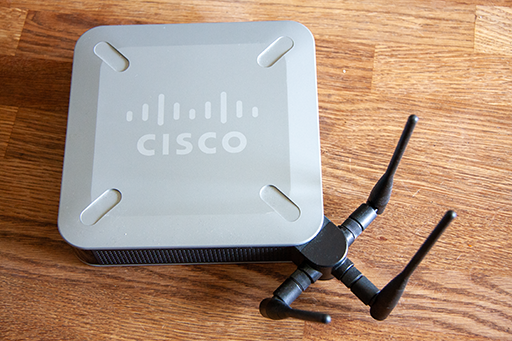
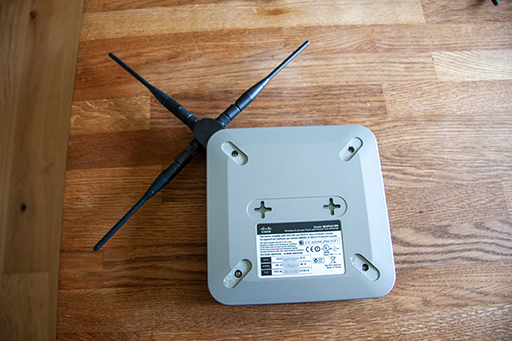
We pick up the device from the dumpster, put it into a backpack and take it home. When we get home we take a look at the back of the device. There’s stuff like serial number, model number and so on.
We can just use this information to go on the internet and find out more about the device. It’s always a good idea to start at the manufacturers site. Let’s see what Cisco says about their product.
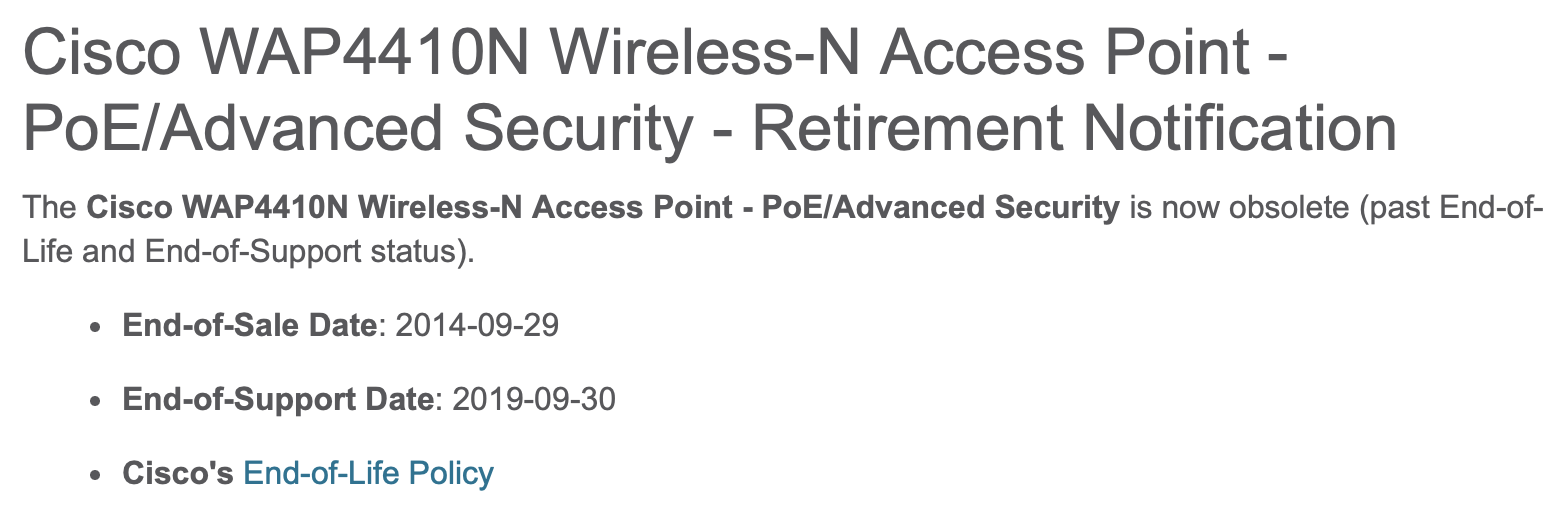
So the device is a wireless access point. We could probably have guessed that seeing the bouquet of antennas. They stopped selling it 10 years ago and it reached end of life 5 years ago. So it has been 5 years without security updates. Hopefully that’s why it ended up in that dumpster.
There seems to be at least two CVE:s out there regarding this product.
- CVE-2014-0659
- CVE-2015-6358
They are both very old and should hopefully be patched since support for this device was active until 2019. We can gather more information about possible vulnerabilities if we need but for now that’s enough. Let’s see what we can find out about the device by trying to start it.
Scanning
First things first. Let’s attach the power and see if the device seems to be working.
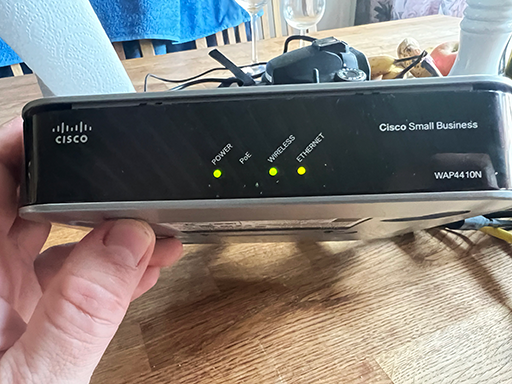
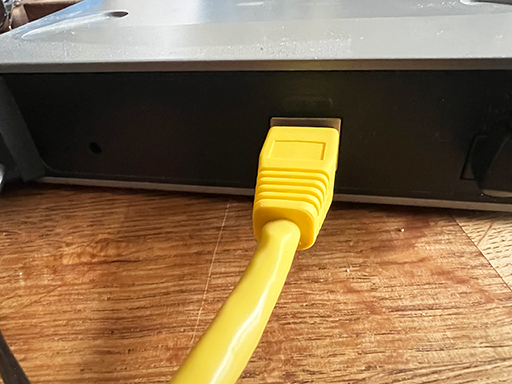
And just like that it started up. There’s power, we seem to have a wireless network and I just could not resist to plug in an ethernet cable in the only port available at the back of the device, that’s probably why the ethernet led is lit.
Since the wireless led was lit you could guess that it’s got some wifi configured. Let’s see if the device is broadcasting some SSID:s.
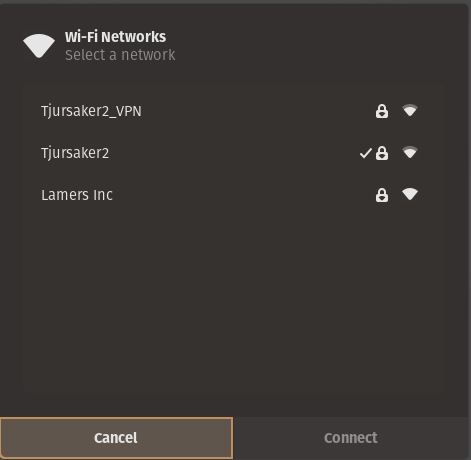
There’s one that I have not seen before called Lamers Inc. That must be what our WAP4410N is broadcasting. Let’s see if we can connect to it.
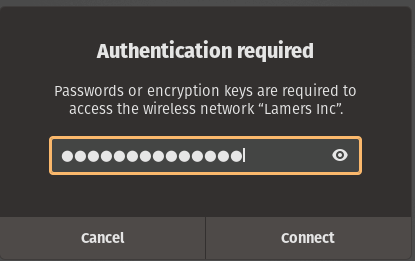
I tried a few standard passwords but I could not get a connection to the WiFi. Without other client talking to the access point we wont be able to attack it further this way. Well, ok it’s old there could be something but lets go back to that ethernet connection. First of all let’s see if we got ourselves an ip-address.
> ifconfig
docker0: flags=4099<UP,BROADCAST,MULTICAST>  mtu 1500
        inet 172.17.0.1  netmask 255.255.0.0  broadcast 172.17.255.255
        ether 02:42:af:5f:ef:f2  txqueuelen 0  (Ethernet)
        RX packets 0  bytes 0 (0.0 B)
        RX errors 0  dropped 0  overruns 0  frame 0
        TX packets 0  bytes 0 (0.0 B)
        TX errors 0  dropped 0 overruns 0  carrier 0  collisions 0

enp0s31f6: flags=4099<UP,BROADCAST,MULTICAST>  mtu 1500
        ether e8:6a:64:26:1e:e4  txqueuelen 1000  (Ethernet)
        RX packets 0  bytes 0 (0.0 B)
        RX errors 0  dropped 0  overruns 0  frame 0
        TX packets 0  bytes 0 (0.0 B)
        TX errors 0  dropped 0 overruns 0  carrier 0  collisions 0
        device interrupt 16  memory 0xee300000-ee320000

enxa0cec8a9bd0a: flags=4163<UP,BROADCAST,RUNNING,MULTICAST>  mtu 1500
        inet 192.168.1.25  netmask 255.255.255.0  broadcast 192.168.1.255
        inet6 fe80::4541:e8f8:d92c:24b1  prefixlen 64  scopeid 0x20<link>
        ether a0:ce:c8:a9:bd:0a  txqueuelen 1000  (Ethernet)
        RX packets 8724  bytes 7269009 (7.2 MB)
        RX errors 0  dropped 0  overruns 0  frame 0
        TX packets 9238  bytes 793914 (793.9 KB)
        TX errors 0  dropped 0 overruns 0  carrier 0  collisions 0

lo: flags=73<UP,LOOPBACK,RUNNING>  mtu 65536
        inet 127.0.0.1  netmask 255.0.0.0
        inet6 ::1  prefixlen 128  scopeid 0x10<host>
        loop  txqueuelen 1000  (Local Loopback)
        RX packets 9418  bytes 1024188 (1.0 MB)
        RX errors 0  dropped 0  overruns 0  frame 0
        TX packets 9418  bytes 1024188 (1.0 MB)
        TX errors 0  dropped 0 overruns 0  carrier 0  collisions 0
Yes we have an ip-address. Im configured to get it via DHCP so the router must be configured to do just that. To find out what ip-address the router uses we could probably look for the default setting in the manual of the device. But even quicker is probably using nmap.
> nmap 192.168.1.0/24
Starting Nmap 7.80 ( https://nmap.org ) at 2024-09-08 17:19 CEST
Nmap scan report for pop-os (192.168.1.25)
Host is up (0.00027s latency).
Not shown: 999 closed ports
PORT   STATE SERVICE
80/tcp open  http

Nmap scan report for 192.168.1.245
Host is up (0.0014s latency).
Not shown: 998 closed ports
PORT    STATE SERVICE
80/tcp  open  http
443/tcp open  https

Nmap done: 256 IP addresses (3 hosts up) scanned in 12.15 seconds
Since I am 192.168.1.25 and nothing else is connected to this network I guess 192.168.1.245 must be the router. Two ports are open which I guess both are the web based administration interface of the router. Let’s see if we can reach it.

Yes that seems to be it. A few Googles away we can find the default username and password which is admin/admin. Let’s try that and a few other combinations as needed
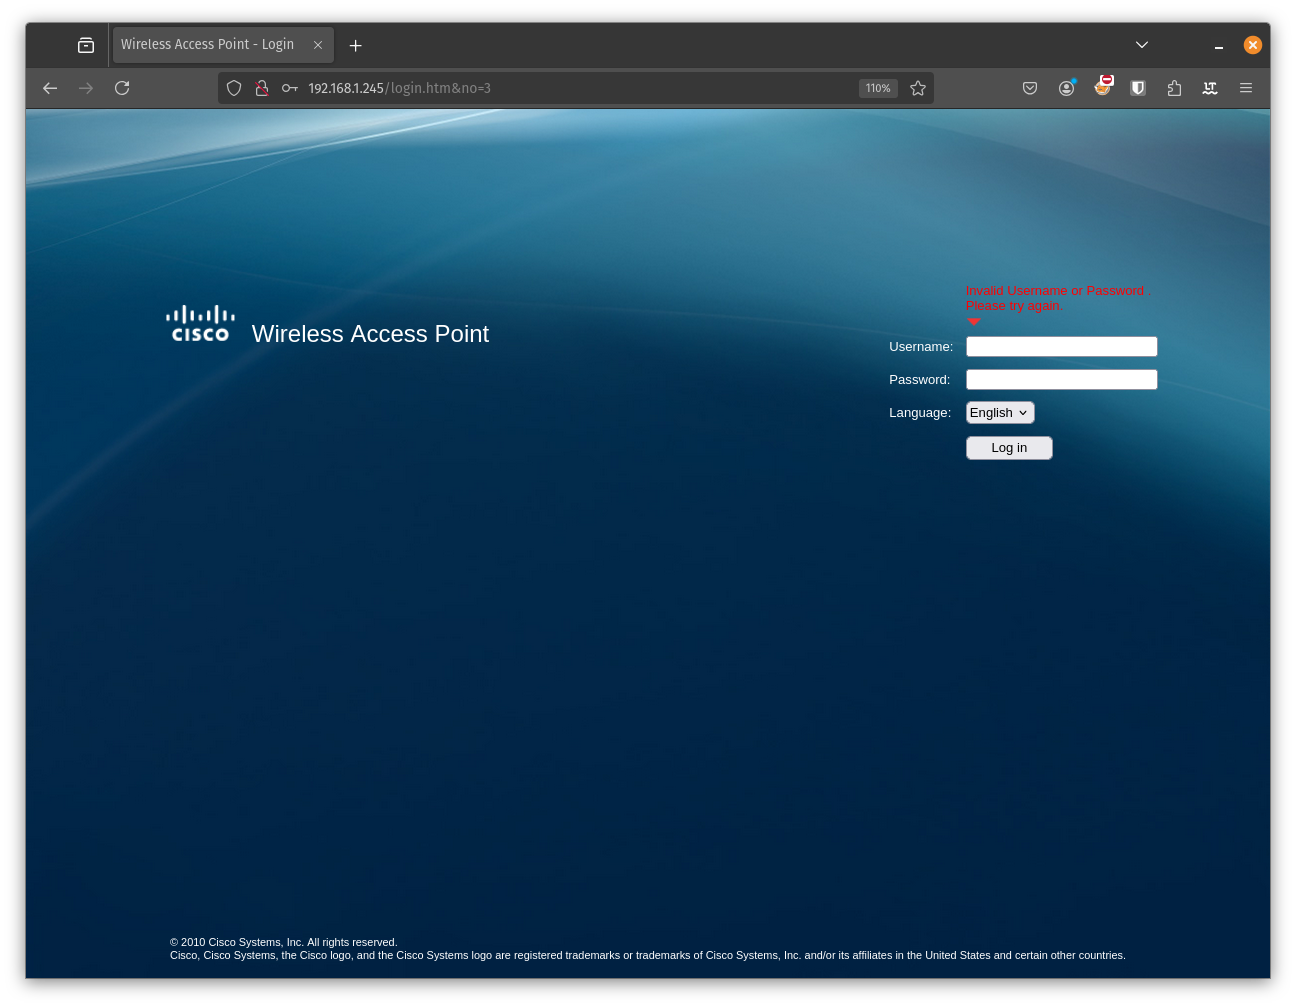
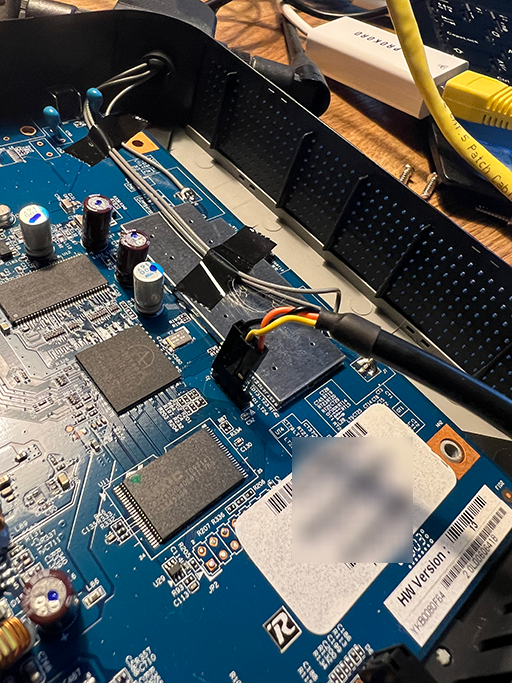
No success. From here we could go down a few different paths. One of them could be using Hydra or some other tool to try to break into the device by brute forcing the password. But we actually got physical access to the device we are trying to get into. Let’s just start by using a simple screwdriver and open up the device.
Inside is a single motherboard with a few chips. You can see where the antennas are connected and so on. Once again theres a few ways we can go from here. We will probably get back to some of them later in this series. But I always tend to start with the path of least resistance. In this case that would be some kind of UART serial interface that i can connect to. And what do I see there…
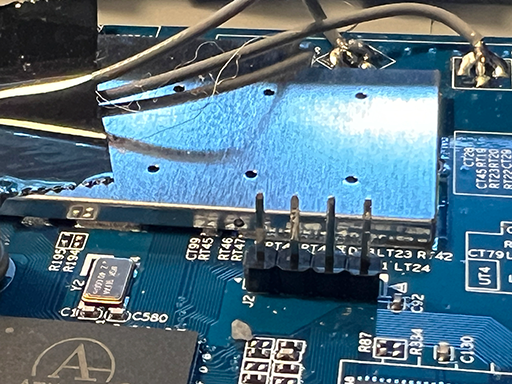
That looks very VERY much like a UART connection. I think we are ready for some action!!!
Gaining Access
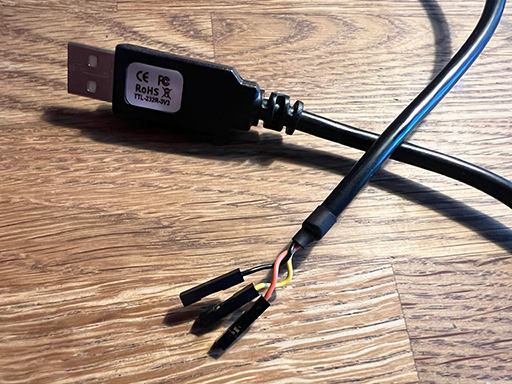
We are going to use a usb2uart adapter to connect there. That cable looks like this:
The only thing we need to figure out now is which of the pins to connect. We got ground (gnd), transmit (tx) and receive (rx). To figure that out we could just trial and error. Or we could use a multimeter.
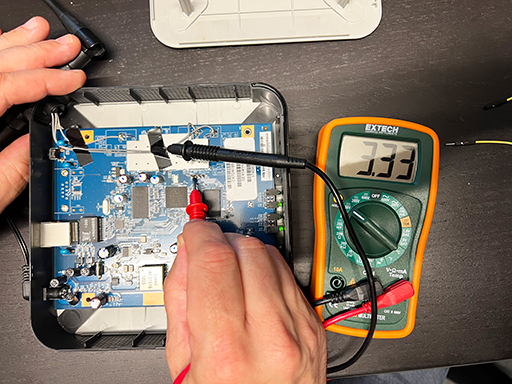
Using a shielded area for ground I probed every pin after power cycling the device. The first pin from the left was always low which indicates it’s GND, the one to the far right stays hig so that should be +.
The two pins in between were fluctating but after a minute the left one stays high and the right one stays low. This probably means that info is output during boot and when that is finished transmission stops. TX then stays high and RX stays low.
That should give the pin layout GND, TX, RX, +. So we should attach GND to GND, our TX to the boards RX and our RX to the boards TX.
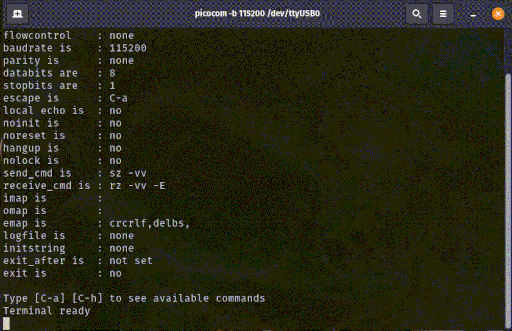
This is what I ended up with: black to GND, yellow to TX and orange to RX. We have to guess the baud rate and we try a rather high value like 115200 for a rather modern device like this. Now let’s start up picocom.
> picocom -b 115200 /dev/ttyUSB0
picocom v3.1

port is        : /dev/ttyUSB0
flowcontrol    : none
baudrate is    : 115200
parity is      : none
databits are   : 8
stopbits are   : 1
escape is      : C-a
local echo is  : no
noinit is      : no
noreset is     : no
hangup is      : no
nolock is      : no
send_cmd is    : sz -vv
receive_cmd is : rz -vv -E
imap is        :
omap is        :
emap is        : crcrlf,delbs,
logfile is     : none
initstring     : none
exit_after is  : not set
exit is        : no

Type [C-a] [C-h] to see available commands
Terminal ready
And now power on the the wap4410n to see what happens at our terminal.
That’s kind of what I expected and what usually happens with these kind of devices. The different stages of the boot process is printed to out console. We can get a ton of information here but what’s most suprising and interesting is when the boot stops. We press enter and without a password we are greeted with a prompt. Let’s find out what we can do.
[VAP0 @ wap88a74c]# ls -la
drwxrwxrwx    7 0        0               0 var
drwxr-xr-x    7 0        0              81 usr
drwxrwxrwx    4 0        0               0 tmp
drwxr-xr-x    2 0        0             254 sbin
drwxr-xr-x    2 0        0              36 root
dr-xr-xr-x   46 0        0               0 proc
drwxr-xr-x    2 0        0              23 lost+found
drwxr-xr-x    3 0        0             820 lib
drwxr-xr-x    2 0        0               3 include
drwxr-xr-x    3 0        0              24 home
drwxr-xr-x    9 0        0             388 etc
drwxr-xr-x    3 0        0             403 dev
drwxr-xr-x    2 0        0             323 bin
drwxr-xr-x   15 0        0             149 ..
drwxr-xr-x   15 0        0             149 .
[VAP0 @ wap88a74c]#
Hell yes we get right into the device! Not that surprising it seems to be some kind of Linux. The prompt indicates that we are root (#) which is even more incredible. But let’s try to find out if we really are.
 [VAP0 @ wap88a74c]# id
-sh: id: not found
There’s no id command available and guess what I tried whoami with the same result. This is a limited linux system probably running on busybox or something like that. But that’s something we can get back to later. Now let’s just try this to see if we can access root:s files.
[VAP0 @ wap88a74c]# ls -la /root/
-r--r--r--    1 0        0              39 .profile
-r--r--r--    1 0        0               0 .dummy
drwxr-xr-x   15 0        0             149 ..
drwxr-xr-x    2 0        0              36 .
And we can so everything suggests that we are root. We are allready kings of the kingdom but it could be a nice thing to be able to get into that web interface. If we can find out where the web application is located we can figure out how authentication works and perhaps crack some hashes or bypass it. First of all let’s see what is mounted in the filesystem.
[VAP0 @ wap88a74c]# mount
/dev/mtdblock2 on / type squashfs (ro)
/proc on /proc type proc (rw,nodiratime)
ramfs on /var type ramfs (rw)
ramfs on /tmp type ramfs (rw)
devpts on /dev/pts type devpts (rw)
A read only / with squashfs is very expected for this kind of device. Not that much else that catches my attention. There are a few mountpoints with read/write but with ramfs indicating that these are volatile. After some poking around I found out that there’s a lot of stuff in /tmp.
[VAP0 @ wap88a74c]# ls /tmp/
var                 snmpd.conf          wsc_mac
hw_info             snmpdtrap.conf      chan_list
country_list        cpu_stat_cgi        chan_curr
nvram               wlan0_up0           maxpwr_curr
cmd_agent           wlan0_up1           wscdata_00.bin
cpu_stat            wlan0_up2           dhcpc.conf
www                 wlan0_up3           wlan_delif.ath00
htpasswd            wlan0_up4           mDNSResponder.hold
syslog.conf         wlan0_up5
That www directory does almost certain contain the web application which we are looking for. BUT what’s even more interesting here is that htpasswd file. htpasswd could be used to store usernames and the password hashes. Let’s see if we can find anything interesting.
[VAP0 @ wap88a74c]# cat /tmp/htpasswd
admin:5up3r53CR37p422w0rD!
WTF???? That’s a username alrgight but not a hash. It looks pretty much like a password in clear text. Is it supposed to be this easy? Well, let’s fire up our browser and try our new credentials at the admin interface.

And when we click login….
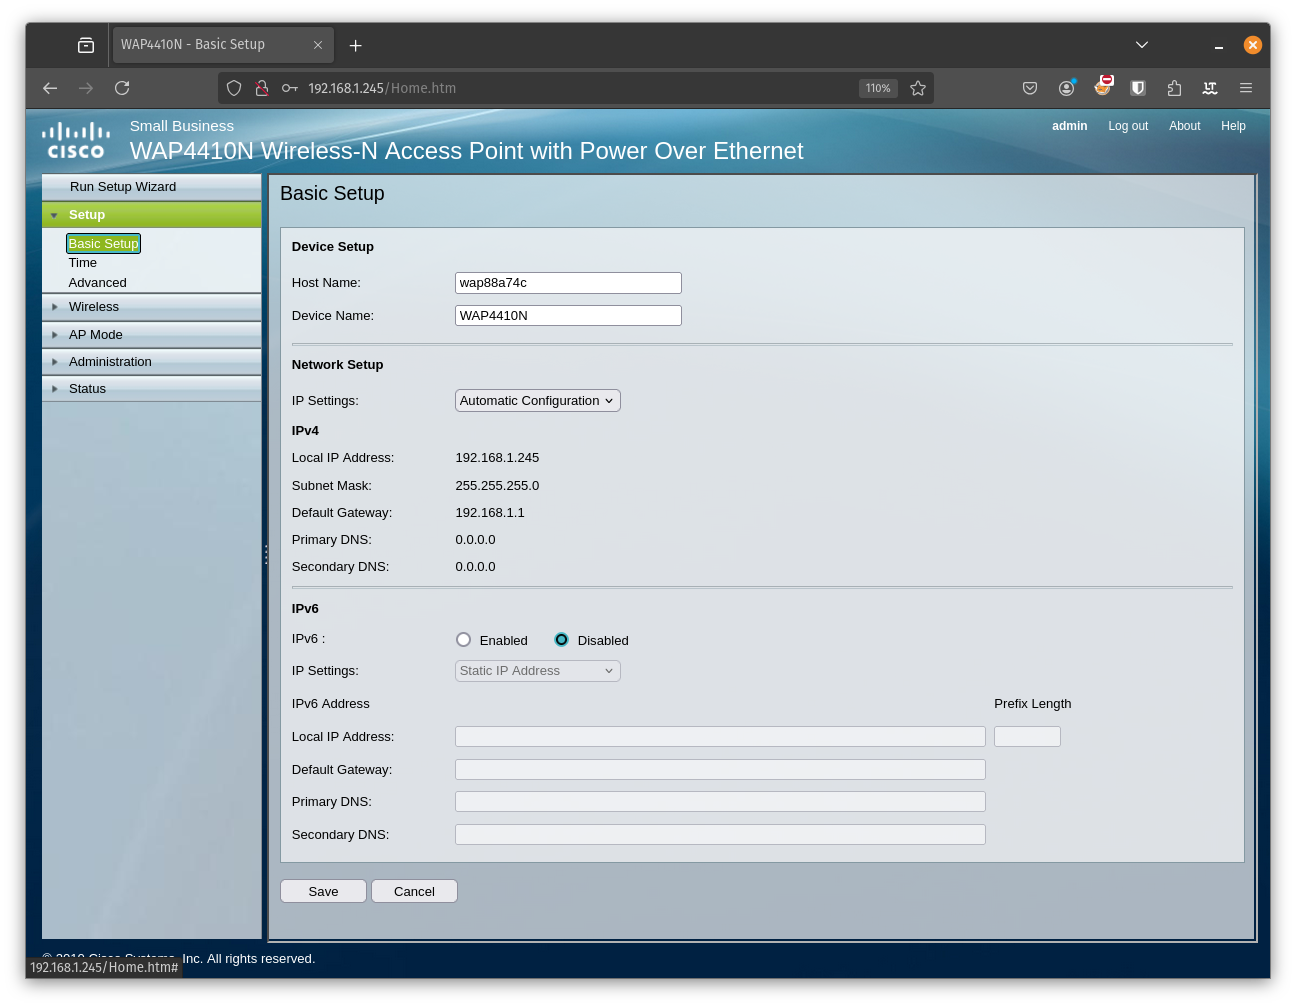
At this point I was a bit confused. This sucks so much. Ok this device is old, but not THAT old. You could at least expect that your passwords are protected by not storing them in clear text. Well if we head over to the wirless menu and the security section we can see even more interesting information.

At this point im not surprised anymore. That’s the PSK which we can see in clear text even in the GUI. Were things really this bad 5 years ago? We do now have total control of the device from every point of view. That’s about enough for part one. Let’s sum this one up.
Summary
First of all, physical access to a device always equals full access in the end. The question is how much time and resources you have at your disposal vs how much effort the supplier put into protecting it.
In this case the effort of protecting it is… well… zero. You do need physical access to the device to exploit what we found so far so as long as you keep your devices in a safe locked space you should be ok??? Well, I think we will discover when going further that this level of security that permeates all parts of the device.
This just makes it dead easy to start reverse engineering and find other vulnerabilities. I think you could expect a higher level of security in such a device even if it’s five years since EOL. This is just stupid. The UART could at least have been protected by a password so that we need to get our soldering irons warm.
The takeaway from this is: DON´T you ever throw away devices without either fatory resetting them (I would not trust that to do the job) or completely destroy them. Change your passwords often to avoid that any password goes out with the junk but is still present in another active device.
And with that we wrap this up. This was just the start on this journey. It was much easier to get into the device then I could imagine. But things will probably get more advanced as we dig deeper into this device and start to reverse engineer it to find more attack vectors.
Until the next time, happy hacking!
/f1rstr3am

